Pankil is a Civil Engineer turned freelance writer. Since his arrival at Guiding Tech in 2021, he delves into the world of how-tos, and troubleshooting guides for Android, iOS, and Windows. Besides his new-found love for mechanical keyboards, he's a disciplined footfall fan and loves international travel with his wife. Learn about our Tech Review Board
Updated July 11, 2024Windows 11 includes a useful repair tool for fixing app-related issues. You can use it to fix any common issues with the Windows Security app and see if that helps.
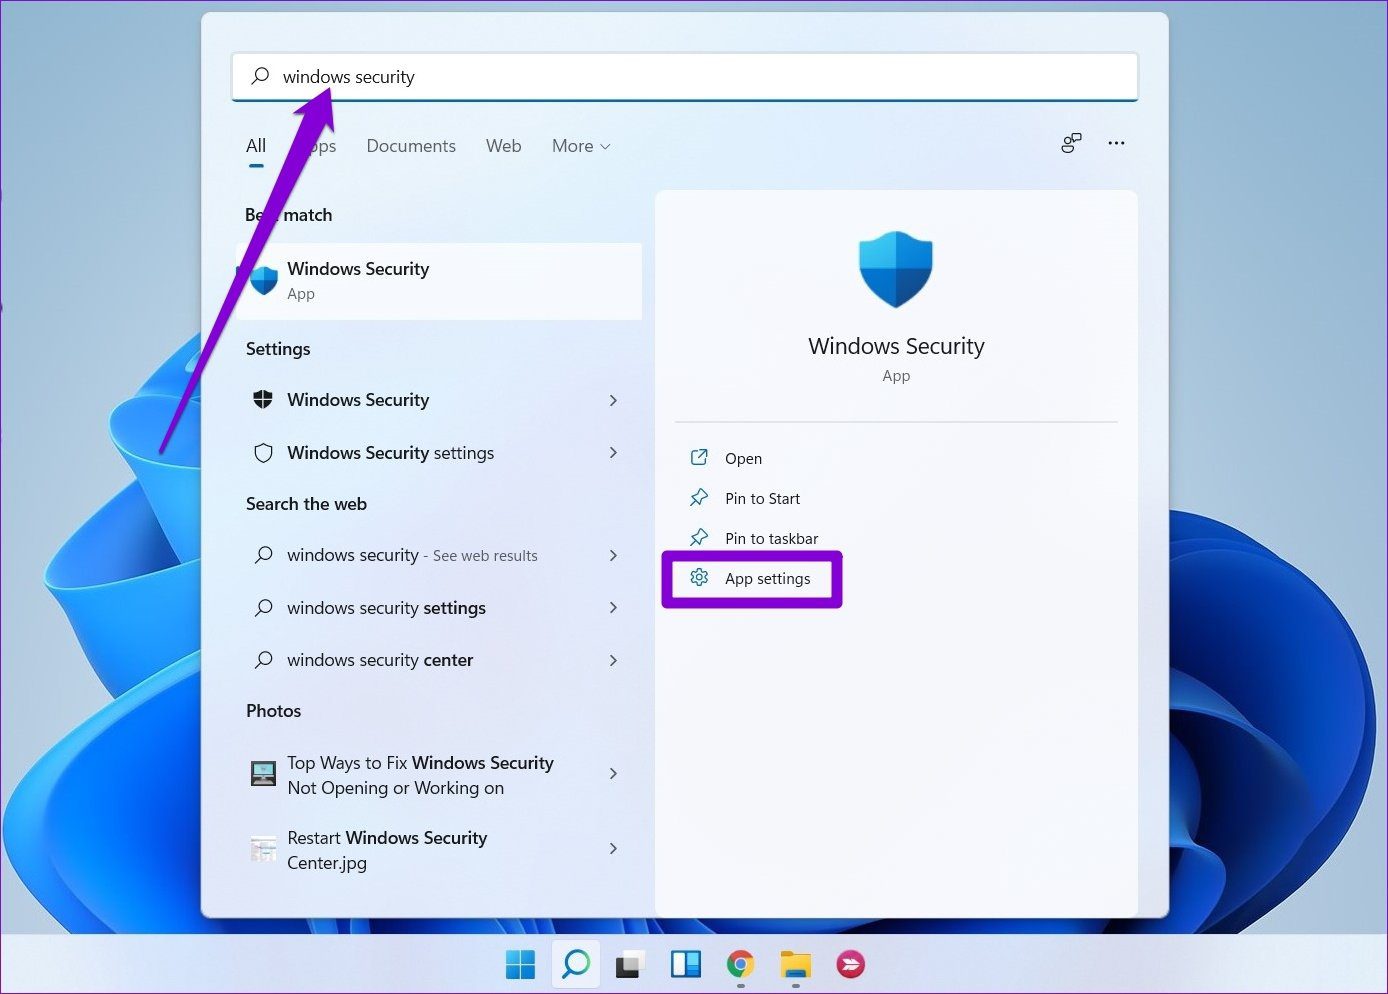
Step 1: Click the search icon on the taskbar, type in Windows Security, and select App settings from the right pane.
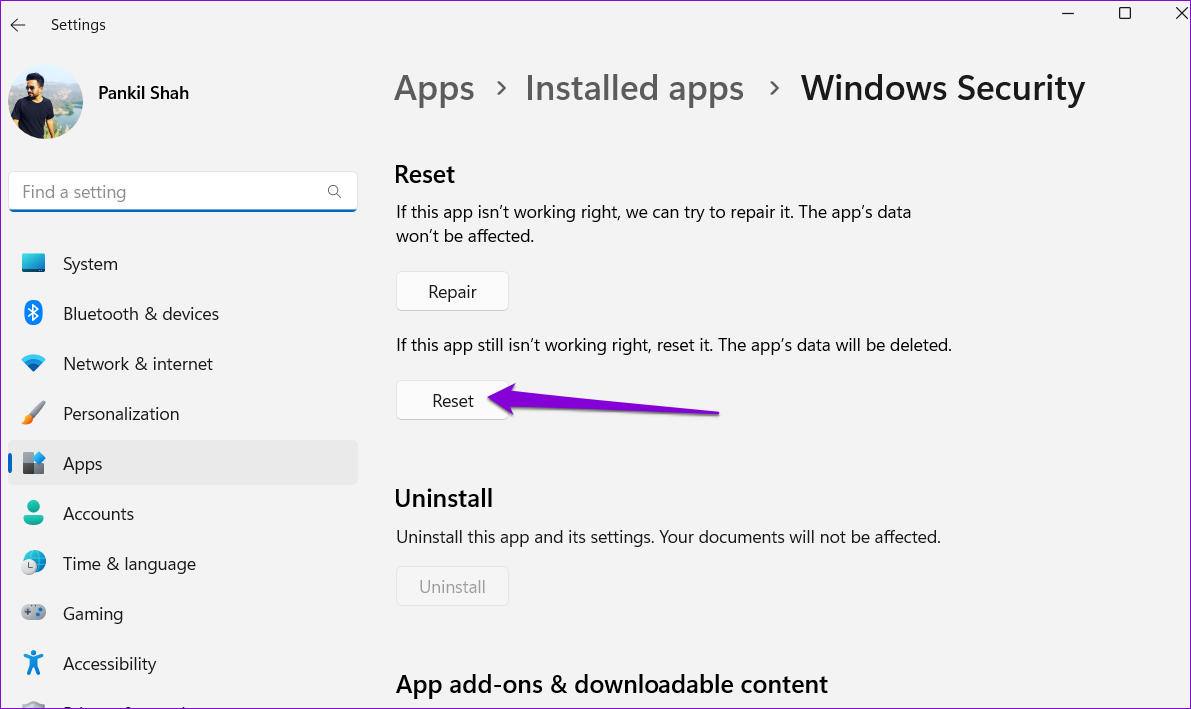
Step 2: Scroll down to the Reset section and click the Repair button.

If the issue remains even after attempting a repair, repeat the same steps above and click the Reset button.
Several users on the Microsoft forums reported fixing issues with the Windows Security app by resetting it via PowerShell. You can also give this method a shot.
Step 1: Click the search icon on the taskbar. Type in Windows powershell and select Run as Administrator from the right pane.

Step 2: Paste the following command in the console and press Enter.
Get-AppxPackage Microsoft.SecHealthUI -AllUsers | Reset-AppxPackage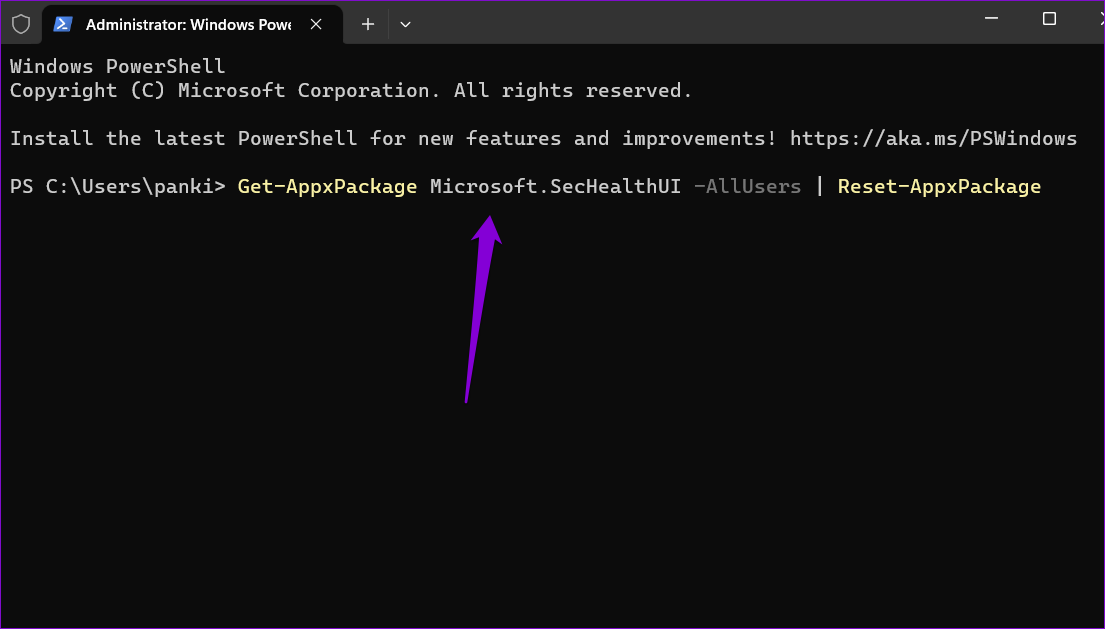
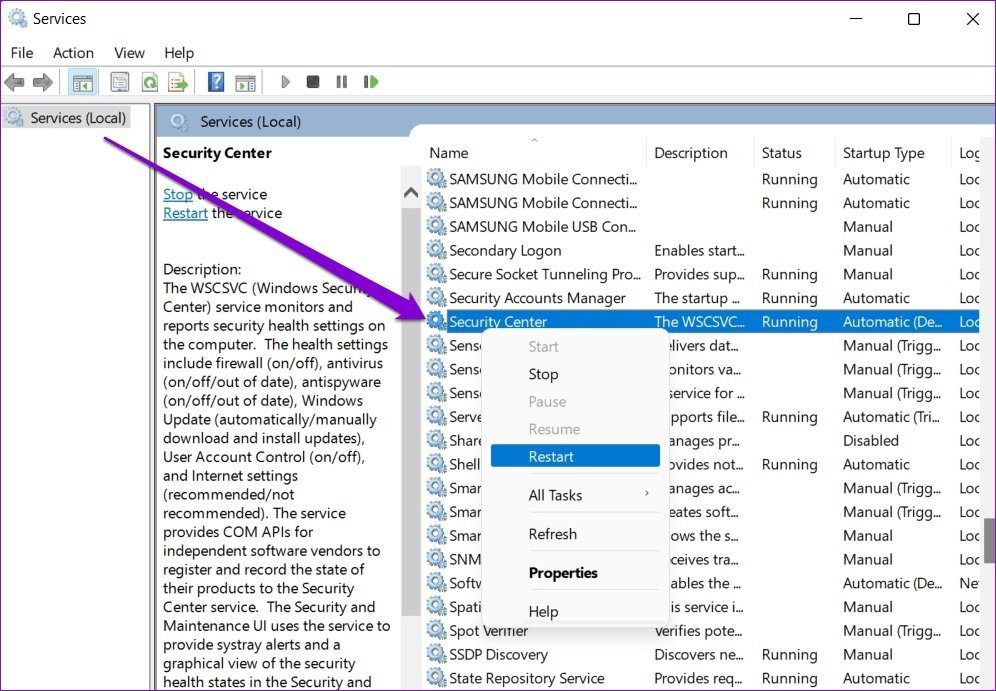
Security Center Service is a small program that monitors security settings on your computer. If the service has failed to start correctly for some reason, you might have trouble accessing the Windows Security app. Here’s what you can do to fix it.
Step 1: Press the Windows key + R to open the Run dialog. Type services.msc in the text box and press Enter.
Step 2: In the Services window, scroll down to locate the Security Center service. Right-click on it and select Restart.
If you’re facing similar issues with other apps and programs as well, some system files on your PC may be damaged or missing. You can try running the SFC (System File Checker) and DISM (Deployment Image Servicing and Management) scans to replace any problematic system files with their cached versions. Here’s how.
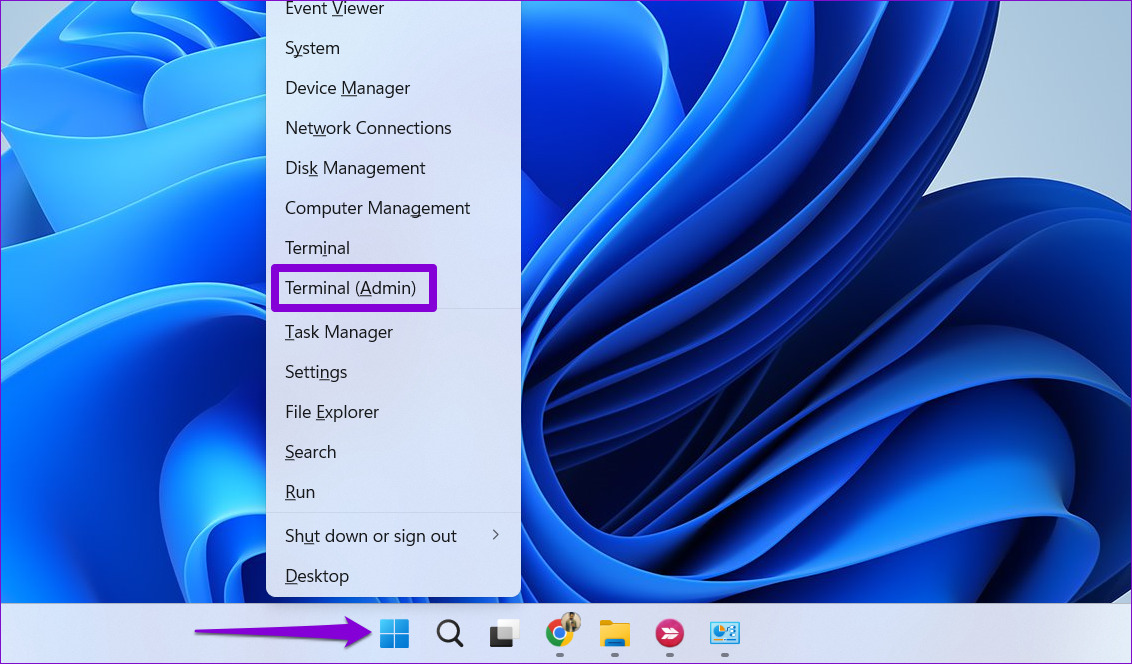
Step 1: Right-click on the Start icon and select Terminal (Admin) from the list.
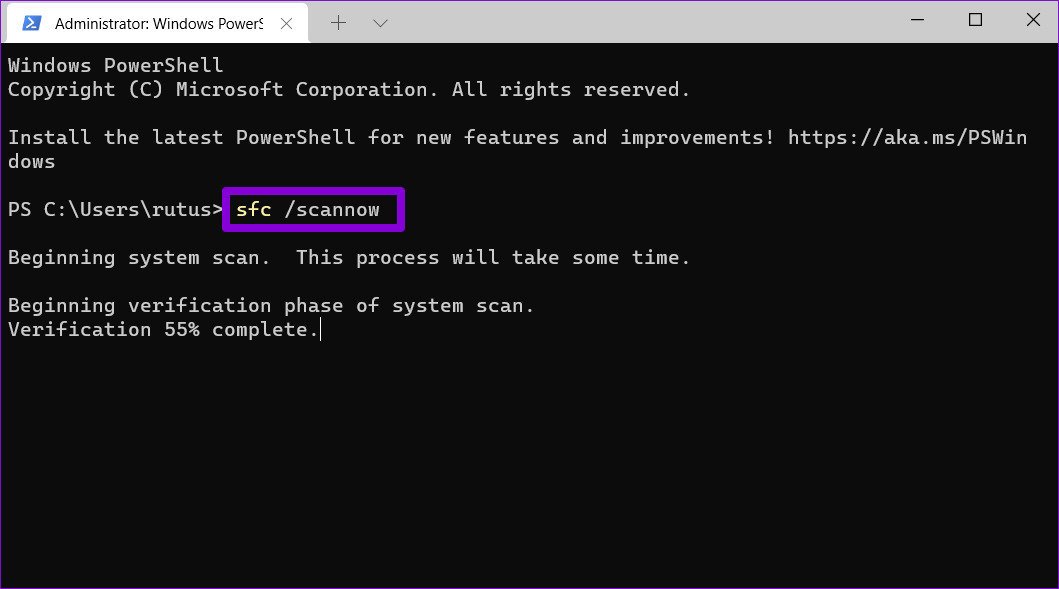
Step 2: Type the command mentioned below and hit Enter.
sfc /scannow
Step 3: Run the following commands one by one for the DISM scan:
DISM /Online /Cleanup-Image /CheckHealth
DISM /Online /Cleanup-Image /ScanHealth
DISM /Online /Cleanup-Image /RestoreHealth

Wait for the scan to complete and then restart your PC.
Malicious third-party apps and services running on your PC can also disrupt Windows operations and cause such problems. You can start your PC in a clean boot state to check for this possibility.
Step 1: Press the Windows key + R to open the Run dialog, type msconfig in the Open field, and press Enter.
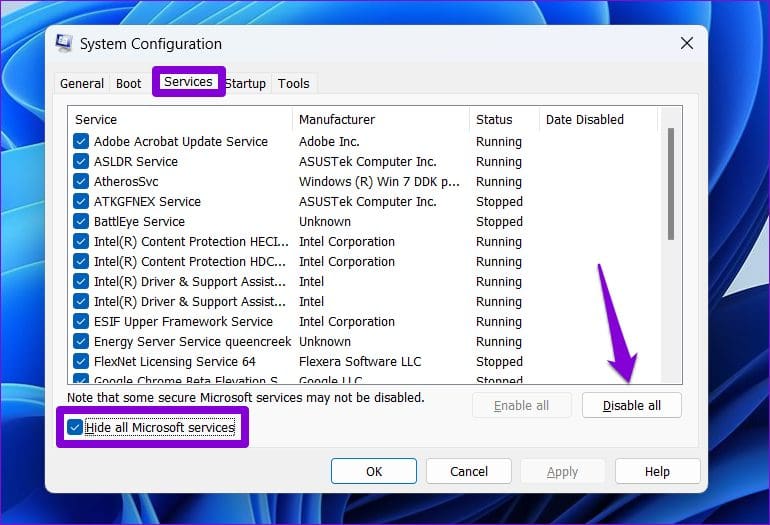
Step 2: Under Services, tick the Hide all Microsoft services checkbox. Then, click the Disable all button.
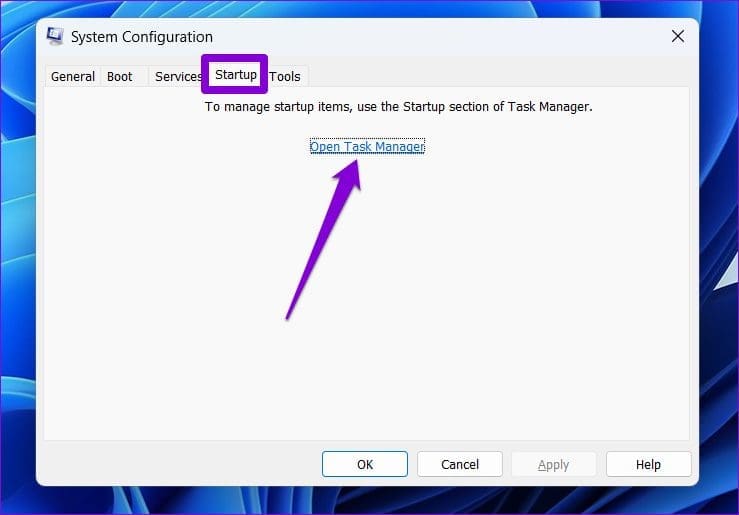
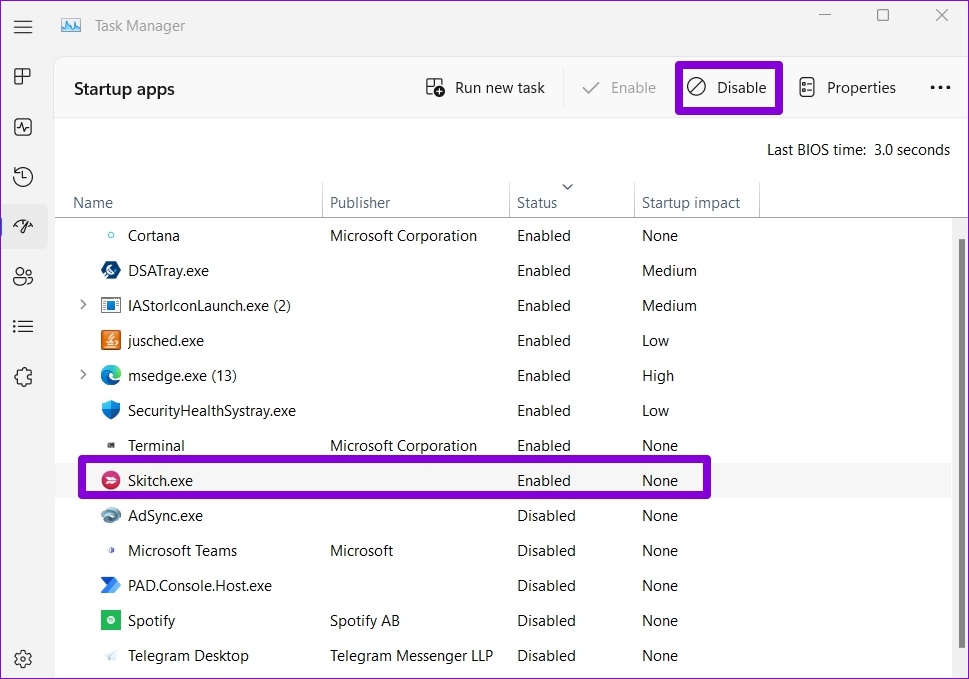
Step 3: Switch to the Startup tab and click on Open Task Manager.
Step 4: Select a third-party app or program and click the Disable option at the top. Repeat this step to disable all third-party apps and programs.
Restart your PC to enter a clean boot state and try to open Windows Security again. If this solves your problem, look through any recently installed apps and programs and remove them.
If all else fails, you can consider resetting your PC as a last resort. Don’t worry, it’s possible to reset Windows 11 without losing your data.
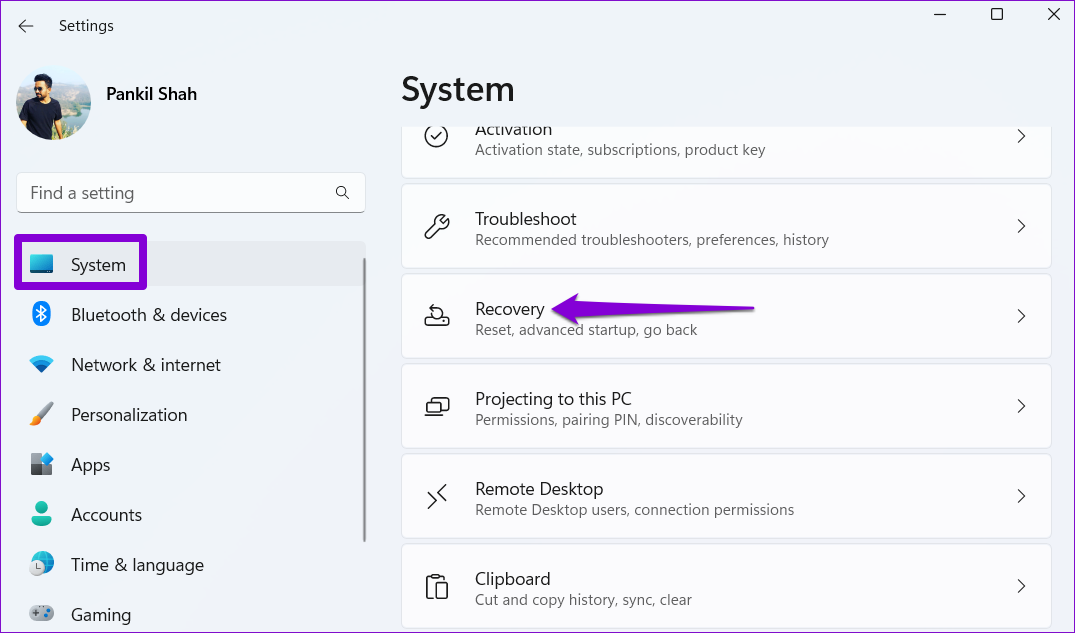
Step 1: Press the Windows key + I to open the Settings app. In the System tab, click on Recovery.
Step 2: Click the Reset PC button.

Step 3: Select the Keep my files option and then follow the on-screen prompts to finish resetting Windows 11.